Lighting a Path with Bollards
Bollards are diverse luminaires that are most commonly used for illuminating pathways. Knowing how to properly specify bollards and utilize the various styles and distributions is crucial in creating a successful and efficient lighting design.
Continue reading to learn more about lighting a walking path with bollards, and about how the mounting height, spacing, and light direction of these fixtures can affect the overall design and illuminance levels

Choosing your mounting height
Typical pedestrian pathways require a minimum illuminance of 0.1fc for safety. The minimum light level is what dictates how far the fixtures will be spaced: the darkest place between fixtures should never be below the minimum illuminance level.
Due to the nature of light, fixtures with a high mounting height will have a lower illuminance level directly in front of the fixture and will be able to push more light out to the sides. This allows for a wider spacing between fixtures.
Fixtures with a lower mounting height produce the opposite: they will appear brighter directly in front of the fixture and will quickly darken out to the sides. This causes a need for more fixtures to be spaced closer together to meet the minimum light level.
In Example 1, see how various bollard heights can affect spacing requirements and light levels.
Small Bollard
The small bollards have a low mounting height of only 8 in. With the source so close to the ground, a distinct bright area is created in the direct vicinity of the luminaire. Luminaire spacing of 8 ft is needed to maintain minimum light levels.
Medium Bollard
The medium-sized bollard has a mounting height of 1.5 ft. Here, the required spacing to maintain the minimum illuminance level is 15 ft and the distribution is more uniform compared to the small bollards.
Large Bollard
The large bollard has a mounting height of 3 ft. The light between fixtures blends together uniformly. The luminaire spacing is 30 ft.
Spacing your luminaires
When viewed from above, the light distribution of the three bollard examples can be easily compared. The isoline shown on each graphic illustrates where the illuminance from the fixture reaches 0.05 fc on the ground surface. This value is important for determining the maximum luminaire spacing. A slight overlapping of these isolines is recommended because light is cumulative: in the overlapping area the light from each fixture is added together and results in 0.1 fc. This layout will then meet the minimum illuminance value required on the path.
In public spaces, uniform illumination is an important safety aspect. A typical public pathway will be larger than a residential or private pathway. A larger area will be more balanced and uniformly illuminated when the tall bollards are utilized. Smaller bollards are more commonly used in private environments.


 Directing your light
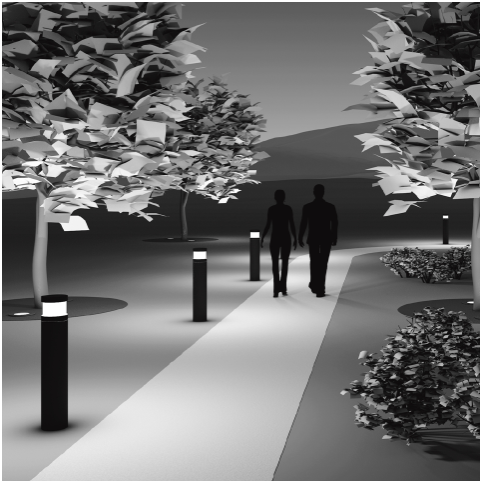
A pedestrian-only pathway in the middle of a park is illuminated by bollards. These fixtures are unshielded and light the pathway and surrounding areas uniformly. The bollards are spaced 20 ft apart, so that the minimum light level on the pathway does not fall below 0.05 fc. In this application, a lower minimum light level is acceptable because this is not an egress route, the path is mostly straight and flat, and this is intended for pedestrian use only away from vehicle and bicycle traffic.
Another important aspect to consider is vertical illumination which is crucial for facial recognition and creating an inviting and safe space. In addition to the unshielded light from these bollards, in-grade luminaires uplighting the trees provide additional ambient light to make visitors on this path feel safe.
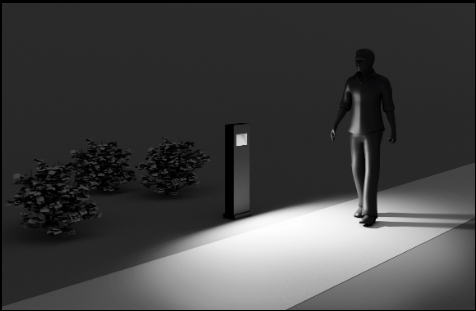
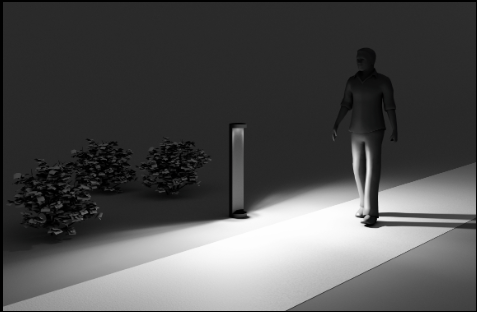
In Example 2, observe how different light distributions can alter a pathway’s illumination and the surrounding elements.

Shielded Light
The light is directed downwards and is contained in the immediate vicinity of the bollard. The bollard is fully shielded, so there is minimal light output above the horizontal. The light appears the brightest directly in front of the fixture, and quickly darkens out to either side. The resulting effect is a high level of visual comfort, uniform illumination, and maximum glare control.

Wide Beam Light
This type of fixture features a wide distribution: the light is directed out to the sides instead of in front. Compared to the shielded source, this fixture does not appear as bright directly in front of the fixture, but clearly illuminates a much wider area. This bollard is full-cutoff for applications where uplight is restricted. This type of fixture is best for maintaining minimum illuminance levels with the widest spacing.

Unshielded Light
These luminaires distribute unshielded light, which is uniform and best for ambient lighting. These luminaires also offer a high degree of vertical illumination, which is important for the recognition of people as well as architectural and landscape elements.

Calculating Luminaire Spacing
A lighting designer wants to use an asymmetric bollard to light a footpath. During planning they decide on a minimum illuminance level of 0.1 fc, and therefore reference the 0.05 fc line on the isofootcandle diagram. Based on this diagram, 10 ft from the bollard the illuminance on the pathway will be 0.05 fc. So, if another bollard is placed 20 ft from the first, the illuminance level between the two will add up to 0.1 fc.
Determination of the luminaire spacing “a” for illumination of a pathway with LT-BL using the luminaire‘s isofootcandle diagram shown below.
Isofootcandle diagrams can be found on all Photometric Summaries, which are located in the Downloads section of our product pages.


